
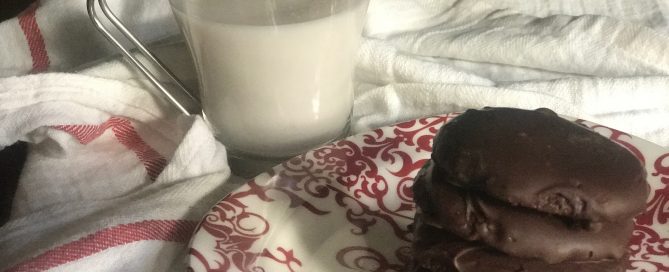
I love Thin Mints, and by “love” I mean I could easily plow through an entire sleeve of them in one sitting. Like many other cookie-craving Americans, I’d “help” out our local Girl Scouts by handing over enough dough for several boxes (so I could freeze them and enjoy them […]

| Servings |
|
- 8 oz. butter room temperature, organic from pasture-raised cows
- 1 c. Organic powdered sugar
- 1 tsp. organic vanilla extract
- 1 c. cacao powder
- ¾ tsp. Fine sea salt
- 1 ½ c, organic whole wheat pastry flour (if you can’t find organic, do your best to avoid kinds enriched flour varieties. Note: I typically recommend unhybridized einkorn flour because it naturally contains less gluten and is more nutrient dense, but I found organic whole wheat pastry flour worked better in this recipe.)
- 1 ½ lbs. dark chocolate morsels (I prefer at least 63% cacao) – for coating the cookies
Ingredients
|
|
- Preheat oven to 350 degrees F. (if using convection oven, reduce to 325 degrees)
- To make the cookie dough, cream the butter in a mixer until fluffy. Gradually add in the powdered sugar and mix on low-medium speed until thoroughly blended (use a spatula to scrape the bowl’s sides and ensure the butter and sugar are thoroughly mixed). Add the vanilla extract, salt and cacao powder to the butter/sugar mix and cream together at low-medium speed until all ingredients are well blended (it will resemble frosting). With the blender on low, gradually add in the pastry flour and mix until the flour is just incorporated. IMPORTANT: Do not overmix the dough. The flour should be mixed in until it is no longer powdery, but the mixer should be shut off when the dough still has a slightly crumbly consistency. This is what will give the cookie centers their hallmark crispy center once baked.
- On a clean counter or marble slab board, work the dough into a ball until it just reaches a smooth consistency (again, avoid overworking!). Wrap the dough ball in plastic wrap or a zipped storage bag and chill in the freezer for 20 minutes.
- Roll the chilled dough onto unfloured counter or baking slab, to a thin 1/8” or so (the thinner the better, although cookies thinner than 1/8” can be difficult to keep from breaking when coating with chocolate). I find it is easier to roll out half the dough ball at a time.
- Use a small, round cookie cutter to cut out the cookies (I wanted mine roughly the same size as traditional Thin Mints, so I improvised and used a 1 ¼-inch lid from a vitamin container as my “cookie cutter.” It worked great and didn’t cost a dime.).
- Carefully lift the cookies with a very thin spatula or knife, and place on a parchment-lined cookie sheet approximately one inch apart (these cookies don’t spread much, but you don’t want them to invade each other and ruin the circular shape, so give them some room).
- Bake on center rack for 8 to 10 minutes, or until the tops are no longer doughy
- Allow to fully cool on wire racks (15 minutes or more)
- Prepare chocolate-peppermint coating: Melt the chocolate morsels on stove top over low heat (or place morsels in glass dish and microwave 30 seconds at a time, stirring in-between until the chocolate is completely melted and velvety smooth).
- Add the peppermint to the melted chocolate, tasting as you go to ensure you reach the desired level of minty chocolatiness (I go a smidgen more than I think I need because I love mint and the cacao cookie can handle a bit more, in my opinion).
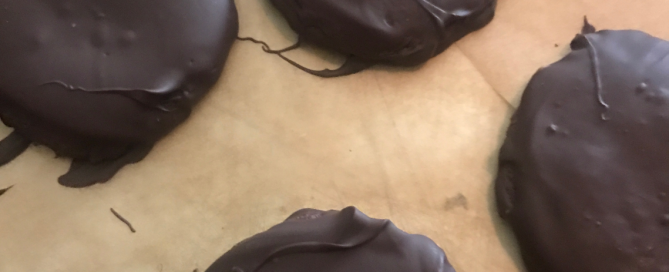
- Using a large, flat fork, place each cooled cookie on the tines and carefully dip into the chocolate-peppermint coating. Gently turn the cookie, so top/bottom/sides are coated equally, and use a butter knife to remove any excess (you want a smooth, even coating on all sides – not so thin that the cookie shows underneath but not so thick that the cookie is drowning in chocolate). Be prepared: this part can get a little messy, but you’ll get the hang of it in no time.
- Place the coated cookies on another parchment lined cookie sheet and transfer the sheet (uncovered) to the freezer. Note: I have a chest freezer, which affords me more space; however, if you are short on freezer space, you can freeze small batches in covered containers. Just be sure not to stack your coated cookies atop one another until the chocolate is fully chilled. Once all cookies are chilled, you can place them in a container, with each level topped with a sheet of parchment paper to help absorb moisture and keep cookies from sticking together).
- For the ultimate dessert, spear a cookie on top of a scoop of organic ice cream or dip one (or two…or three!) into a glass of vanilla-almond milk (or whichever milk you prefer).
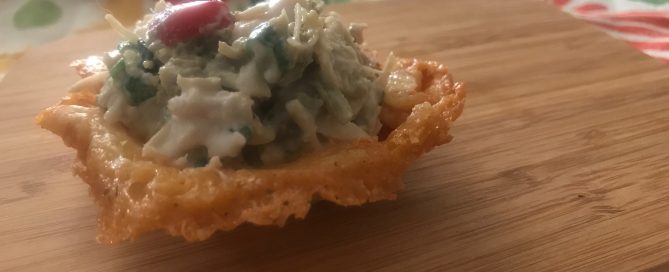
If you love cheese and cool, fresh chicken salad, you’re in for a treat with this recipe – my favorite light and fresh lunch item, especially when the temperatures start to climb (it’s also a great accompaniment to a bowl of tomato soup, though, so it’s good any time).
The “cups” […]

| Servings |
|
- 3 c. freshly grated hard manchego or parmesan cheese (don’t use previously grated or containerized types – these don’t melt well because of the added ingredients and dehydrated texture. Not to mention, freshly grated cheese just tasted better)!
- 1 pinch Ground black pepper (for cups -- optional)
- 10 oz. white chicken breast shredded or diced into extra small chunks (organic, free-range, if possible)
- 6-8 whole organic cherry or grape tomatoes diced
- 2 stalks green onions finely chopped (approx. ½ c.)
- 1 ½ T. fresh parsley finely chopped
- 1 pinch sea salt & freshly ground black pepper to taste
- 1 pinch paprika
- ½ c. mayo
Ingredients
|
|
- Preheat oven to 250 Degrees F.
- Freshly grate individual mounds of manchego cheese onto a silpat mat or non-stick baking sheet, (form a slightly mounded circle about the size of medium-size pancakes (4-5 inches in diameter)
- Bake cheese for 2 ½ to 3 minutes, or until golden brown and crispy (watch closely as it melts to avoid burning) TIP: If you remove the cheese from the oven too soon – before it turns golden grown and almost resembles crispy hash browns – you will end up with rubbery cheese that will appear greasy and not harden).
- Remove cheese from oven and use a very thin spatula to gently lift under the outside edges, working carefully inward toward the center of the cheese circle to maintain its shape.
- Promptly drape each cheese circle over the domes of an upside-down muffin tin (allow to cool completely). Note: I use mini muffin tins for appetizer-size cups, but you may use any size tin you wish. If using full-size muffin tins, more cheese will be needed).
- Once cheese cups are fully cooled, gently remove from the tin mold, using care to not break off the lovely lace-like edges.
- Fill each cheese cup with the chicken salad mixture and serve immediately.
- Stir together chicken, tomatoes and onions – set aside
- Whisk together mayo, parsley, paprika, salt and pepper
- With a large spoon, scoop mayo mixture into chicken mixture and gently incorporate until chicken mix is fully coated
- Chill chicken salad in a covered bowl for at least one hour
- Scoop chilled chicken salad into cheese cups and garnish with optional sliver of baked cheese.
- Serve and enjoy on its own, or as an appetizer or side dish.
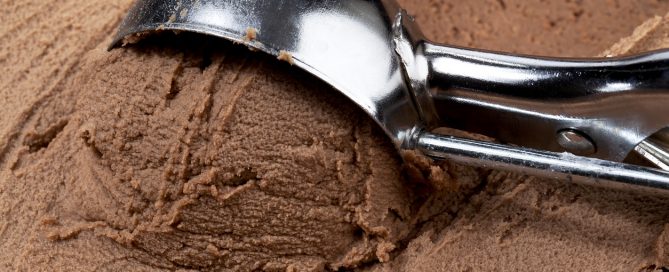
Ice cream is made for summer, but if you’re allergic to dairy (or trying to watch your weight – who isn’t?), it can be recipe for disaster. Take heart, though, you can still have your treat and eat it, too! The magic of this Twice as Nice Cream lies in […]

| Servings |
|
- 4 whole ripe, frozen bananas (peeled and chopped). It’s easier to peel and chop the bananas at room temperature and then place the pieces in a zipped bag or covered container for freezing). Ideally, bananas should be heavily spotted. This gives the dessert its sweetness.
- ½ c. cocoa powder unsweetened
- 3 T. almond butter (unsweetened) – this ingredient is optional, but does help mask the banana flavor and create a truer, richer chocolate ice cream flavor and consistency (personally, I don’t use nut butter because I like the mild banana flavor. It tastes like an ice cream sundae!).
- 1 pinch Fine sea salt
Ingredients
|
|
- Add all ingredients to blender or processor and process on medium-high speed until the mixture is smooth and fully incorporated (the cocoa may want to cling to the sides of the blender or processor, so use a spatula to scrape the sides as needed).
- ** If the mixture is too thick to blend properly, you can add a splash of nut milk (or your other favorite milk) to thin it out a bit. Add just a little bit at a time or you’ll end up with a milk shake instead of firmer ice cream.
- For a soft-serve texture, serve immediately and transfer what remains to the freezer for up to a day or two (any longer and the texture can become icy – although the flavor is still great!)
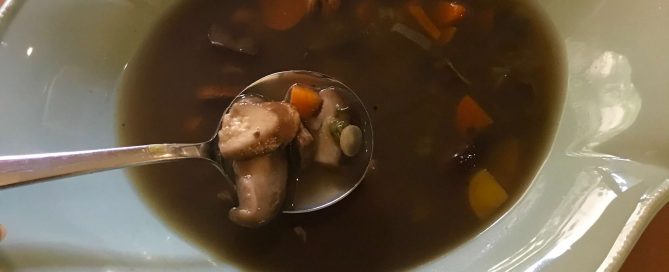
When winter’s chill-you-to-the-bone temperatures take hold, there’s nothing like a bowl of hot and savory soup to warm the soul. When I was a kid, a piping cup of soup and a gooey grilled cheese sandwich was my mom’s go-to meal for me and my sisters when we stomped off […]

| Servings |
|
- 2 containers Shiitake mushrooms (3.2 oz.)
- 1 container Baby Bella mushrooms (3.2 oz.)
- 2 individual Portabella mushroom heads
- 2 individual stalks celery
- 4 whole green onions
- 1 bag baby carrots (12 oz.)
- 1½ t dried thyme
- 1 container vegetable broth (32 oz.)
- 1 chicken broth (16 oz.)
- salt & pepper To taste
Ingredients
|
|
- Finely dice carrots, celery and onions, and add to large saute pan.
- Add 16 ounces of vegetable broth to pan and simmer until vegetables become tender (approximately 12 minutes)
- Add the thyme and give it a good stir
- Gradually add the chopped mushrooms, stirring with the simmered vegetables and broth until they start to cook down and turn the soup base a rich brown.
- Continue adding the remaining mushrooms and gradually add the remaining 16 ounces of broth.
- Simmer entire contents for 15 minutes longer, then remove from heat.

- Add all contents, plus the bone broth and traditional broth (32 ounces total), to a large pot and simmer on low for one hour.

Serve immediately. Leftovers will keep refrigerated for several days (this recipe also freezes well).
Gluten-Free Hint o’ Mint Cookies

| Servings |
|
- 1 c. Almond flour (not almond meal)
- 1 tsp. coconut flour
- 2 T. cacao powder
- ⅛ tsp. Sea salt (fine grain)
- ¼ tsp. Baking soda
- 2 T. butter (organic from pasture-raised cows)
- ¼ c. raw local honey
- 1 to 1 ½ tsp. pure peppermint extract (according to taste brand potency), plus another ½ to ¾ tsp. peppermint extract for chocolate coating
- ½ to ¾ tsp. pure peppermint extract (for chocolate coating)
- 8 ounces natural dark chocolate morsels (I prefer at least 63% cacao)
Ingredients
|
|
- Preheat oven to 350 degrees F (325 degrees if using convection oven)
- In a powerful blender or food processor, combine on medium-low speed the almond flour, coconut flour, cacao, baking soda and salt.
- Add in the butter, honey and peppermint extract, pulsing until the mixture forms a dough consistency.
- Form the dough into a ball (being careful not to overwork) and roll it out between two piece of parchment paper or plastic wrap until dough reaches approximately ⅛” thickness
- With dough still wrapped between the two parchment/plastic wrap pieces, place in freezer for 15-20 minutes
- Using a 1 ½ - 2” round cookie cutter, cut out the dough and carefully place about an inch apart on a parchment-lined cookie sheet
- Bake for 3-5 minutes (ovens vary, so check watch closely to avoid burning!)
- Allow to cool directly on cookie sheet (transferring them to wire racks while still warm could cause breakage).
- Once cooled, move to freezer (ideally, while still on cookie sheet) and chill for an hour
- Melt chocolate on stove over low heat, stirring continuously to avoid burning; once thoroughly melted and smooth, add the peppermint extract and stir together well.
- Rest chilled cookies on top of fork tines and carefully dunk into the chocolate mixture, ensuring both sides are evenly coated.
- Place coated cookies on parchment-lined plate or container (one level only; do not stack!) and freeze. Once all coated cookies are frozen (10-15 minutes in freezer, they may be carefully stacked, with parchment paper between each layer to prevent excessive moisture, and stored again in the freezer).